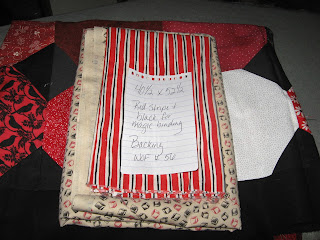
So I was looking for a fundraiser for our local Relay for Life in June. I am the Co-Captain of our work team and I am determined to make this year a success. My sister was diagnosed with breast cancer in 2011 and she spent 2012 undergoing numerous procedures including chemo, a mastectomy and reconstructive surgeries. Then I lost my Q in August of 2012 and all I can think of is how nice it would have been to have extra time with him. And if I can do just a little that might enable someone else to have extra time with their loved one, then I'm all in. So this is my method for making these key chains. I have seen other tutorials on Pinterest that inspired me to come up with this, I find it to be easier, sturdier and more finished looking. Other methods required strips of batting to provide a more substantial feel, but I feel i accomplish this with the thick denim. This method also incorporates one of my favorite fabric acquisition methods, up-cycling or recycling, whichever you'd like to call it.
Material list:
Old jeans from the scrap bag cut into 2½"x14½" strips. I happen to be fortunate to live with a couple of XXXL guys and I have found that you can get 14 to 15 key chains per pant leg, but really, if they're in the scrap bag, does it matter? You're up-cycling! Feel good about that!
Focus fabric cut to 2½" x 14¼"
Steam a Seam Lite or similar fusible cut to 7/8" x 14"
Coordinating fabric for thin seam hiding band cut to 2"x5"
Matching thread
1¼" swivel snap hook
First press your denim strip into the middle, try to keep it somewhat even but there's no need for an exact measurement since the accent fabric will be covering the split. I have found that a good steam iron will make all the difference when trying to get your denim to lay flat.
Next sew your focus fabric along the long side wrong sides together with a scant ¼"
Next press over that ¼" seam using your stitch line as a guide
Iron the fusbile strip down the center of the back of the focus strip, catching the edge of the ¼" seam that you pressed over. This will keep fraying in check and keep your key chain nice and neat without thread stragglers.
Peel off the fusible backing and iron down the center of the denim strip doing your best to keep it as straight as possible.
Stitch down the long edges of the focus strip to the denim. I used a buttonhole stitch, but you could use any stitch you find pleasing.
Now its time to slip the snap hook over the sewn fabric strip and join the edges. Butt the two pieces against each other and I used a short stitch length zigzag stitch set at max width to go back and forth a couple of times joining the two pieces.
That line of zigzag stitching isnt so pretty on the front...
....nor from the back. But we're going to fix that with a hider band.
So I use the coordinating 5"x2" strip to make a small decorative hider band. Again this is pressed into thirds along the length. I found that if you can press it so as to leave just 1/8" to ¼" from the edge of the outer fold it will help to keep straggling threads contained.
Slide the hook around so that the zigzag line is about an inch away from the hook and tuck the end of the small band between the 2 layers of the key chain loop.
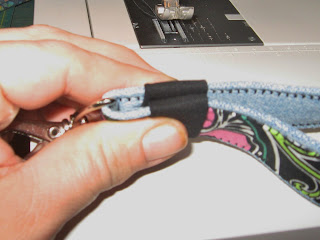
Wrap it around the outside, doing your best to keep it aligned front to back and tuck the end between the folds. It really works best at this point for you to just hang on to it tightly there are a lot of layers of fabric to try to pin through.
Now, s l o w l y sew through all layers on each side of band. (Sorry for fuzzy pic, I hope you can see what I'm talking about) I used a straight stitch simply because there are so many layers of fabric I saw no reason to add any undue stress on my machine. There will be quite a hump to sew over, but if you go slowly you should be able to get a nice straight stitch.
Clip your threads and you are done!


